Saturday 22 October 2011

Time for tea

Afternoon tea is back in fashion as we know. There's also nothing worse than a cold cuppa, so as retro way of keeping your teapot warm a tea cozy is definitely the answer.

A while ago I bought a small collection of small remnants of fabric which the only obvious thing to do with them is patchwork but there wasn't enough for a blanket so a tea cozy is the perfect solution. I started by laying out my rectangles of material and decided in which order I wanted them. I then started sewing them together like a patchwork.


View from the front

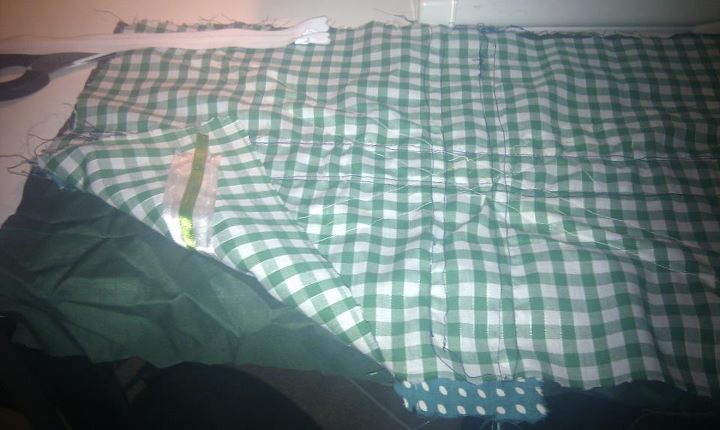
View from the back. As you can see they have all been sewn together with about 5mm at each side to make the view fro the front much tidier.


You want the pattern to be much bigger than your teapot as it needs to fit around it. I found it handy to keep the teapot handy. Once I had both sides done I then added a layer of wadding and another layer of material for the inside of the cozy. Trim into a rounded shape at the top and sew each side together. Then it's time to attach both sides. Lay the patterned sides out facing each other and sew around each side except the bottom side.


Turn the cozy the right way round. All you need to do now is tidy up the edges at the bottom, attach a handle if you want and use it

It does keep your tea all snuggly on these cold nights

Also can be used to keep a friend's head warm too.

Sorry about the lack of detail with the pictures. i got carried away in making it and forgot to take many. Doh!


Friday 21 October 2011

Union Flag Cushion

Been a while since I posted on here but a birthday present and a week of work inspired me to at least do a little sewing. I got a lovely sewing box off my friend Claire for my birthday.

Isn't it pretty.

While organising my sewing kit I found the cushion I'd previously started and decided to finally get it finished. I had already cut the right size pieces for the flag pattern, they just needed sewing in place.

I started by pinning the white cross strip by strip and sewing them onto the background.

I then added the light green ribbon on top of the white.

Lizzie found it all very interesting, to the point where I had to lock her out the room since she thought the ribbon was a toy.

To add a bit if interest to the pattern I then did the background of the second cross in a dotty material. The great thing about the pattern is that you can personalise any way you like. For example multi-coloured or a colour scheme, flowers, polka dots, whatever you want.

To finish the pattern I just needed to pin, tack and sew the last cross of green ribbon.

Once the pattern was finished it just needed tidying up by cutting of loose threads etc and then I could start on turning it into a cushion

Cutting out a piece of green material the same size of the pattern is the next step. I sometimes add lining to make it neater but this time i didn't bother. Place the two sides of material that you want on the outside of the cushion facing each other. And sew around the edges about 1cm in leaving a gap from around 5-10cm on one of the sides This is for your chosen fastening, whether it a zip, buttons etc


I left a small gap and decided that I wasn't going to use a fastening this time. If using a normal cushion filler then I would probably suggest putting on a zip. As a money saver I used ends and scraps of material to fill my cushion. After the cushion is filled it's really easy to just sew up the hole.


After sewing it up then it is all finished and time to sit down drink tea and finish off my birthday cake I think.