Monday 7 November 2011

Odd and ends

The last week or so I haven't really been that productive to be honest. I haven't really finished a project but have been working on a few little bits and pieces.

Up-cycling
This is when you take something old and make something new out of it. Which is the main thing that I do. Most of my material is clothes I've got bored with or scraps of material. I've seen a lot of things lately using old zips to create rings and bracelets, so I decided to have a go myself using the zips off the dresses I've used for material.


Firstly I cut the zip out of the outfit. You only need one side to make a flower so you can make 2 items out of 1 zip (very handy).

Next you need to hold one end of the zip and start twirling it round, holding it in place at the back as you. I decided to leave a little bit of the material on for a nice effect. Remember to have the zip zig-zag side of the outside.

Continue twirling the material up into a flower, altering the shape slightly where needed to make it look less like a tube of material.

When in place pin it at the back.

You can now sew it into place at the back, making sure it won't unravel. you can also put a small circle of material on the back to neaten it up before adding a ring or brooch fastening to it.


I made a few of these while trying to get them right.
They do have a nice effect :)


While looking through my box of ribbons and materials I found a long bit of lace of which I used the same technique on.

I then added a back flower to add a little more detail.


Tea Cozy Take 2
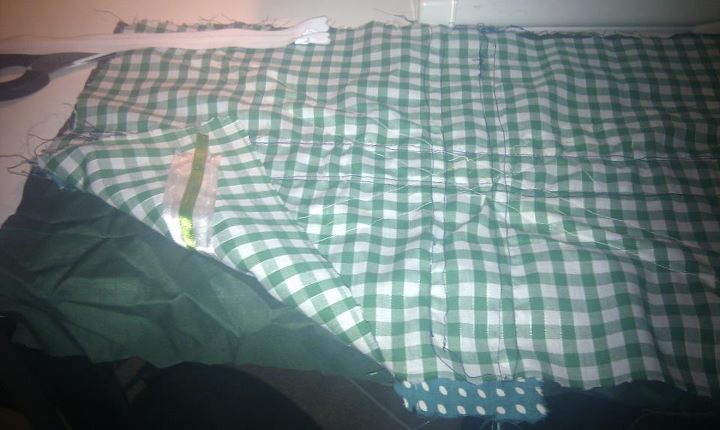
Another thing I've been working on is a tea cozy for my mum for Christmas. It's definitely a work in progress and she might get it next Christmas at this rate.

First I cut out the material for the tea cozy (loosely using my teapot as a measurement). I also cut out the same shape in wadding.

I then used the sewing machine to sew the material and wadding in place, about 5mm from the outside.


My mum loves butterflies so I found some lovely lace butterflies in the craft shop. By themselves they didn't look like enough to me so I have decided to applique a butterfly on there myself. So far I only have it pinned down but hopefully I will get my act together and do it properly.


Cake Time
I think my main reason for not being productive is the fact I got distracted by cake, which is very easily to do. My wonderful flatmate bought me The Great British Bake-off cook book for my birthday (http://www.amazon.co.uk/Great-British-Bake-Off-Victoria/dp/1849902682/ref=sr_1_1?ie=UTF8&qid=1320709592&sr=8-1) and I decided to make a Victoria sponge instead of sew. I added cream (which Mary Berry says is not a Victoria sponge) but it did taste nice. Tempted to spend tomorrow making Paul Hollywood's iced buns. Yummy.

Saturday 22 October 2011

Time for tea

Afternoon tea is back in fashion as we know. There's also nothing worse than a cold cuppa, so as retro way of keeping your teapot warm a tea cozy is definitely the answer.

A while ago I bought a small collection of small remnants of fabric which the only obvious thing to do with them is patchwork but there wasn't enough for a blanket so a tea cozy is the perfect solution. I started by laying out my rectangles of material and decided in which order I wanted them. I then started sewing them together like a patchwork.


View from the front

View from the back. As you can see they have all been sewn together with about 5mm at each side to make the view fro the front much tidier.


You want the pattern to be much bigger than your teapot as it needs to fit around it. I found it handy to keep the teapot handy. Once I had both sides done I then added a layer of wadding and another layer of material for the inside of the cozy. Trim into a rounded shape at the top and sew each side together. Then it's time to attach both sides. Lay the patterned sides out facing each other and sew around each side except the bottom side.


Turn the cozy the right way round. All you need to do now is tidy up the edges at the bottom, attach a handle if you want and use it

It does keep your tea all snuggly on these cold nights

Also can be used to keep a friend's head warm too.

Sorry about the lack of detail with the pictures. i got carried away in making it and forgot to take many. Doh!


Friday 21 October 2011

Union Flag Cushion

Been a while since I posted on here but a birthday present and a week of work inspired me to at least do a little sewing. I got a lovely sewing box off my friend Claire for my birthday.

Isn't it pretty.

While organising my sewing kit I found the cushion I'd previously started and decided to finally get it finished. I had already cut the right size pieces for the flag pattern, they just needed sewing in place.

I started by pinning the white cross strip by strip and sewing them onto the background.

I then added the light green ribbon on top of the white.

Lizzie found it all very interesting, to the point where I had to lock her out the room since she thought the ribbon was a toy.

To add a bit if interest to the pattern I then did the background of the second cross in a dotty material. The great thing about the pattern is that you can personalise any way you like. For example multi-coloured or a colour scheme, flowers, polka dots, whatever you want.

To finish the pattern I just needed to pin, tack and sew the last cross of green ribbon.

Once the pattern was finished it just needed tidying up by cutting of loose threads etc and then I could start on turning it into a cushion

Cutting out a piece of green material the same size of the pattern is the next step. I sometimes add lining to make it neater but this time i didn't bother. Place the two sides of material that you want on the outside of the cushion facing each other. And sew around the edges about 1cm in leaving a gap from around 5-10cm on one of the sides This is for your chosen fastening, whether it a zip, buttons etc


I left a small gap and decided that I wasn't going to use a fastening this time. If using a normal cushion filler then I would probably suggest putting on a zip. As a money saver I used ends and scraps of material to fill my cushion. After the cushion is filled it's really easy to just sew up the hole.


After sewing it up then it is all finished and time to sit down drink tea and finish off my birthday cake I think.

Monday 13 June 2011

Flowers

Today I've mainly been focusing on flowers to use on a few of my designs including hair clips, brooches etc. I've used two different methods to create flowers.

Method 1, The easy, less fiddly one
This basically involves a lot of ribbon and a needle and thread. I used smaller pieces of ribbon in similar colours so I could graduate the colour of the petals. I actually got the ribbon pieces as an absolute bargain from the pound shop.


I used a running stitch along the edge of the ribbon.

When I had done all the running stitch in all the ribbon I could then pull the thread to ruffle the ribbon.

Once all the ribbon was done and ruffled then I could shape the flower in the position desired and sew it together at the back.

Method 2, Involves a lot more precision
I read about this method on a few other blogs and decided to try it out. Firstly I needed 6 larger squares of material and 4 slightly smaller squares.

With the squares of fabric I then cut each separate pile into a circle shape.

Once that was done I could then cut petal shapes into the fabric. Don't follow my idiocy and not use a pattern.

Once the flower shapes are cut the smaller pile can then be placed on top of the other. I then mixed up the sequence of the petals to make it more like a flower.

A stitch was then put in the middle to hold the pile together. Squeezing and shaping the back of the flower shaped pile then added a more realistic shape to the overall flower. this could then be stitched into place.

Then the flower is complete and could be added to a hair clip or whatever takes your fancy.


Saturday 11 June 2011

Start of the collection...

I've been sewing and crafting for a while but only lately have I decided to take it a little bit more seriously. I'm thinking I might start creating a larger collection, see what people think of them and maybe sell them; see how things go. On here I will be talking about the latest crafts and my progress with them.

For Christmas I decided to make peg bags for my mum and gran, which are a fab place to start if you're looking for something easy to make. All you need really is one piece of material and sew it over to make a pocket, put a hole in the top for a coat-hanger and you're done. You can also add a few cute details such as lining or a bow as seen below...


At the moment I'm working on some clip purses which are turning out to be a bit of a nightmare getting the material to stay in the clip purse frame so any advice would be fantastic. This is what I have so far...

I am also working on a union flag cushion at the moment as well. I keep seeing them everywhere and want to get in on the act. At the moment I'm working on an all green design and have just been working out how I want to material before I start sewing. So far it doesn't look too bad...

Well that was until my cat Lizzie got to it...
Hopefully I'll get it back off her and be able to sew it together soon.